The Basics of Driveway Paving

Driveway Paving

A driveway isn’t just a way to get from the street to your garage; it is an important part of your home’s curb appeal. A paved driveway adds value and can complement any architectural style.Driveway Paving

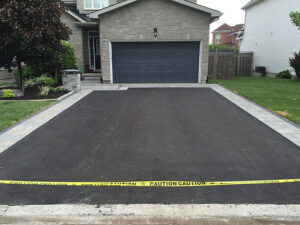
SC Driveway Paving Charleston materials include asphalt, concrete, pavers, and gravel. Consult a professional to decide which material best fits your budget and climate.

The cost of driveway paving varies depending on the material used. While asphalt and concrete are the most common, homeowners can choose from a variety of options, including gravel, pavers, and stamped concrete. Homeowners who want a more stylish look may opt for a paver or brick surface, while those interested in environmental sustainability can choose a permeable paving solution. Whatever the choice, it is important to discuss it with a professional and budget appropriately for the project.

Concrete is a durable surface that can withstand heavy loads, but it is one of the most expensive of all the paving materials. It requires professional installation, and the base and finish will add to the overall cost. However, it will last a long time and is very economical over the long term. It can also be very attractive, and it can complement a variety of architectural styles.

Asphalt is a popular option for driveways because it is relatively inexpensive and easy to install. It is also a green paving choice because it is 100% recyclable. During the paving process, bits and pieces of the old asphalt are ground down and mixed back into the new mix. The recycled asphalt is called millings, and it helps reduce landfill waste. In addition, this material is more resilient to rutting and has better water resistance than virgin asphalt.

Pavers are a highly aesthetic choice that offers unlimited design options, but they can be more expensive than other paving materials. They are made of natural stone, molded clay, and concrete blocks in various sizes and shapes. They are set in a mortar-like mixture of concrete and sand that allows water to drain from the surface.

Stamped concrete combines the durability of concrete with the decorative appeal of pavers and tile. It can be stamped with patterns that mimic tile, brick, or stone, and it costs less than a paver or brick driveway. However, it is more difficult to repair than other types of paving materials.

Gravel is an aesthetically pleasing and inexpensive option, but it can erode easily. It is best suited for a flat or gently sloped surface and should be edged with metal or wood to prevent it from spreading into the lawn or planting beds. Loose stone is also available and can be used to create a more natural appearance.

Material

There are many different paving materials available for driveways, each with its own advantages and disadvantages. Some are better suited for specific climates or architectural styles than others. It’s also important to keep the amount of traffic and usage in mind when choosing a material. The best driveway paving materials will offer long-lasting durability, beauty, and functionality. Some of the most popular are poured concrete, asphalt, pavers, and gravel.

Poured Concrete

Concrete is the most cost-effective option for a new or replacement driveway. It is durable, long-lasting, and available in a wide variety of colors and finishes. It requires little maintenance and can withstand heavy traffic. Concrete can also be shaped to create unique patterns and textures for your driveway. However, this material is not ideal for areas prone to frost heaving or flooding and may need periodic resurfacing.

Asphalt

Asphalt (or tarmac) is a black, oily, puddle-like material that is made of aggregate and liquid asphalt cement. It is typically installed in two layers: a binder course and a top course. The binder course is the heavier layer that contains bigger aggregate pieces (quarters, nickels, and dimes). It is laid over a prepared subgrade and compacted. The top course is the drivable surface that has been rolled and compressed with a roller.

Pavers

A paved, decorative driveway is an attractive addition to any home. It adds value and curb appeal to the property and can complement any style of architecture. Its high-end look comes with a hefty price tag, though. It’s important to consider ongoing maintenance costs and the initial investment when considering this option.

If you opt for a paver driveway, you will need to lay a layer of 4 inches of clean sand. This layer will hold your pavers in place. Ensure the sand is level and compacted using a board or hand tamper. It’s also essential to install edge restraints and cut the pavers to fit the dimensions of your driveway design. Once the sand is in place, you can begin laying your pavers. Start with the largest pavers in the center and work outward to the edges of your design.

Installation

If you are planning to install a new driveway or resurface an existing one, you have many options available. However, it is important to understand the process before you choose a contractor. This will help you make an informed decision and get the best value for your money.

First, you will need to clear the area. This step is essential because any type of vegetation will interfere with laying down a good foundation for your pavers. Moreover, you should check whether there are any underground utilities in the area. If there are, you must inform the utility companies and obtain the necessary permission to dig.

Then, the pavers will be laid on top of this foundation layer. This process is called the base course or sub-base. It is a crucial element of any pavement project because it ensures that the paving materials will hold up under the loads of vehicles. It also helps prevent the surface from shifting over time. The base course is made of crushed aggregate stone, and it may be covered with geotextile fabric to protect the soil.

Next, a layer of binder asphalt is placed over the base course. Dependable Paving uses a 3-inch lift of the material, which is compacted with a double-drum vibratory roller to achieve a smooth surface.

The final layer of your new or overlaid paver driveway is the finish course. This is usually a sand set, although some contractors use bituminous binders instead of sand. This is more expensive, but it will last longer than sand.

In addition to laying the finish course, you should also fill in any gaps between the pavers with joint sand. This will prevent water from seeping into the joints and causing damage to the paving materials. Moreover, it will enhance the stability of your finished product.

For environmentally conscious consumers, permeable pavers are a great option. These pavers look like traditional asphalt paving, but they allow water to flow into the ground and not back into sewer systems. In addition, they reduce the amount of waste that is deposited in sewers from car fluids.

Maintenance

Whether you’ve had a new driveway for several years or yours is freshly installed, ensuring its longevity is important to the overall value of your property. It is important to follow maintenance procedures that keep the surface in good condition, including refilling cracks and applying a sealant every couple of years. These tasks are typically easy to do yourself, although it is recommended that you hire a professional to ensure quality results.

Driveway pavers can be easier to maintain than other materials, such as concrete. However, like asphalt, they should be sealed regularly to prevent deterioration. In addition, regular cleaning is required to remove oil, gas, and chemical spills that can discolor the surface and cause damage over time. A professional paving company can offer a wide range of services, from routine cleaning to repairing damage and installing new paving materials.

The first fourteen days after the installation of an asphalt driveway are critical for maintaining its integrity. It is best if no one drives on it for this period of time, and you or your family members should only park there during the coolest times of day. This is because the material needs to settle and cure properly, which requires proper ventilation.

Both asphalt and concrete driveways should be resealed every couple of years. This is to prevent water from penetrating the surface and causing cracks and potholes. It also keeps the surface protected from UV rays and traffic wear and tear. This can help prolong the life of your driveway and prevent expensive repairs in the future.

Another essential maintenance step for asphalt driveways is to trim trees and shrubs regularly. Overgrown bushes and shrubs can push up the surface of your driveway, which can cause it to crack and shift over time. This can be costly to repair, so it’s a good idea to do it as often as possible.

For homeowners who prefer a more natural look for their driveway, pervious concrete may be a better choice. This type of eco-friendly paving is designed to allow water to flow through its surface, which helps reduce runoff and soil erosion. This is particularly helpful in environmentally sensitive areas, but it can also improve the curb appeal of your home.

Installing New Light Fixtures

Installing new light fixtures is a simple project that can dramatically improve the look of a room. But first, turn off the power to the old fixture by switching off the wall switch and checking with a noncontact voltage detector that can detect live wires without touching them. Next, remove the fixture from the junction box. Then, disconnect the wires by using a screwdriver to remove the wire nuts and pull on the bare copper wires.

installing new light fixtures

Unplug the Old Fixture

Removing the old fixture to install a new one is pretty straightforward, but don’t forget to turn off the power at your circuit breaker before you start working. If you don’t, you could get electrocuted (and a new light fixture wouldn’t do much good).

First, support the fixture with a bent coat hanger to keep it hanging from the ceiling while you work. Then, use a noncontact voltage detector to ensure the electrical wires aren’t live. Touch the tip to a wire’s insulation; it should glow if electricity flows through it. If the detector doesn’t respond, return to your breaker box and turn off the power to the light fixture’s wires.

Once the power’s off, remove the screw from the mounting strap that attaches the old light fixture to the ceiling box. This may be secured with a piece of metal that wraps around the box and screws to it, or a wire nut might just attach it. Next, unscrew the nut and remove the old wire connectors, making sure you support the fixture with the bent coat hanger so it doesn’t fall down.

If the ceiling box is recessed more than 1/4 inch, which is common in homes built before 1985, you’ll need to add a ground wire to comply with code. A 6-inch length of bare copper or green-insulated wire is easy to connect to the box by driving a No. 10-32 ground screw into a threaded hole. If you have to install a ground, also pick up a pack of stab-in connectors; they’re easier to use in tight spaces than twist-on nuts. They’ll grip the wires so you don’t have to twist and turn the screw repeatedly.

Remove the Canopy Piece

Few things change the look of a room more dramatically than a new light fixture. However, like any electrical project, it requires careful handling of dangerous voltage. The electricity flowing through the wires going to a light fixture is just as strong as what passes through the outlets in your walls, so it’s important that you don’t cut corners or rush this job. To mitigate the potential for shock, start by flipping the breaker responsible for the area of your house or business that contains the light fixture to the “Off” position.

Next, remove the old fixture, including any globes or screens, and set it aside. Before disconnecting any wires, use a non-contact circuit tester to make sure no power is running through the junction box and wiring. Once the power is off, remove the canopy (the rounded, broad covering that lies flush with the ceiling) to expose the black, white, and copper wires inside.

Disconnect the wires from the fixture by unscrewing their connectors. You may also need to loosen the screw holding the mounting bracket to the junction box. Some lights have a ground wire connecting to the metal junction box; if so, disconnect and set it aside. Now’s a good time to clean up the exposed wires, too. Remove any dirt or dust from the ends of each wire before reconnecting them to their respective fixtures. Most new fixtures use a color-coded system, so connecting the wires is easy: Twist together the stripped, bare end of the fixture’s black wire with the bare end of the supply line’s black wire, then secure them with a wire nut. Do the same with the stranded, bare copper or green-sheathed ground wire (refer to the fixture instructions if you are unsure which one to attach). You’ll be glad you took this precaution when it’s time to turn the power back on.

Disconnect the Wires

Once the decorative pieces and plate are removed, you should be able to see the wires that connect the fixture to the ceiling box. These should be capped or connected with a screw, and they may have white, black and bare copper (ground) wires. Use a voltage tester to ensure that no electricity is present before proceeding. If there is, turn off the breaker before continuing to remove the old fixture.

Using your wire strippers, remove 3/4 inch of the sheathing from each wire. Then, reattach the capped ends to their respective screws in the junction box, using wire nuts. You should have one white wire (the neutral) attached to a silver screw, a black wire with a black screw and a bare copper or green grounding wire with a green screw.

Before attaching the new fixture, make sure that you have all of the hardware that came with it. It should come with a mounting strap that screws into the ceiling box, as well as a screw to support the base of the light. Some heavy fixtures may require a second person on the ladder to help hoist it onto the strap and set it into place.

If you are installing a new fixture, you will need to determine what kind of bulb it requires. There are many different types of bulbs to choose from, including incandescent, fluorescent, LED and mercury vapor. The type of bulb you choose will depend on the color tone and brightness that you want in your room. In addition, you should decide whether you want the fixture to be dimmable or not. If you are not sure what kind of bulb to use, consult a professional electrician.

Remove the Mounting Bracket

Although novice do-it-yourselfers may be intimidated by the electrical aspects of installing a light fixture, this is a relatively simple job. Begin by shutting off the power at the breaker connected to the circuit you’ll be working on (use a noncontact voltage tester to confirm). Then remove the old light fixture and disconnect the wire connectors from the circuit wires. You will also need to unscrew and set aside the mounting strap that secured the fixture to the junction box in the ceiling. Consult the new light fixture’s directions for specific instructions on how to mount the mounting bracket.

If the junction box contains three sets of capped wiring — black, white and green or copper — you’re ready to move on to connecting your new fixture. Before moving forward, however, use a pair of wire strippers to strip away about half an inch of the plastic coating from each of the three wires in the box. This will expose the braided metal wire underneath and make the connections easier.

If your junction box doesn’t have a grounding wire, you can install one by loosening the green screw in the box that connects the bare copper wire to the mounting strap and then using your electrician’s pliers to bend a small U-shape around the screw so it fits tightly around it. Then wrap the bent end of the grounding wire around the screw in a clockwise direction. You can now reconnect the wiring and install your new fixture, following the manufacturer’s instructions. Make sure the fixture is rated for the wattage of bulbs it uses; substituting with a higher-rated bulb could cause the fixture to overheat or ignite nearby combustible surfaces.

Install the New Fixture

Many novice do-it-yourselfers are intimidated by the idea of installing a new light fixture, but it’s actually a relatively simple project. Once the power has been shut off at the breaker box, it’s just a matter of removing and replacing the old fixture. However, a little background knowledge of electricity and wiring goes a long way toward ensuring that the job is completed safely and correctly.

Before attempting to connect any wires, it’s a good idea to consult the instructions that came with the new fixture. Once you’ve done this, it’s time to get started. Start by carefully unboxing the new fixture, then removing its glass shade and setting it aside in a safe place. If it has a mounting strap, unscrew and set this aside as well.

Next, examine the base of the new fixture for wire connections. It should have three wire leads: a black hot wire, a white neutral wire and a bare copper ground wire. The wires will usually have some insulating coating on them, but if you don’t see this, use a pair of electrician’s pliers to strip about an inch of the insulation away to expose the metal wire underneath. Connect the exposed ends of the two black wires together using a wire connector. Join the white and copper wires in the same manner.

If your fixture has a bare copper ground wire, follow the manufacturer’s instructions to clamp this wire in a separate screw on the ceiling junction box or to a green grounding screw on the wall plate of the ceiling junction box. After you’ve made these connections, it’s time to screw in the new fixture and replace the bulb. Once the fixture is in place, turn the breaker back on and test the lights.

Masonry: A Unique Construction Method

Masonry

Colorado Springs Masonry are the unique construction method that creates durable, energy-efficient, and fire-resistant buildings. It is also a valuable tool for those in the construction industry to have in their arsenal, as it allows them to offer diverse materials and produce sturdy buildings that can withstand severe weather conditions.Masonry

Masonry is a building trade that combines stone, brick, and mortar to create structures. It is a durable building material that can be used for both interior and exterior walls and paving. Brick is available in a variety of shapes, sizes, and colors to suit a specific design. It also offers a good sound barrier, which is ideal for homes and offices located near train tracks or busy highways. Masonry is also a non-combustible material, which can help protect the structure from fire.

The earliest masonry was built using stones, which are a natural material that can be shaped into walkways and walls. Later, people discovered that clay could be blended into a stackable unit, and mortar was created to speed and ease the construction process. Today, brick is one of the most popular masonry materials.

There are three main types of brick: molded, pressed, and sun-dried. Molded brick is formed by molding soft, wet clay in a mold. The bricks are then dried, either in the sun or by using waste heat from the kiln. The resulting bricks have a regular shape and sharp edges. The molded bricks can also be “frogged,” which means that they have indentations on one of the longer faces. This is used for decorative effects and to increase strength.

Pressed brick is a variation of molded brick that is produced by pressing it against a die at high pressure. The result is a brick with a more uniform shape, but it has less strength than a molded brick. Sun-dried brick is similar to pressed brick, but it is not fired in a kiln. The bricks are dried using the sun’s heat, which results in a much less consistent shape and weaker strength.

Another type of masonry is called calcium-silicate brick, which is made by binding lime with siliceous materials such as sand, crushed flint, or quartz, together with mineral colorants. It is a good alternative to clay brick because it has a higher thermal mass and is less porous than other masonry materials. It can also resist corrosion and chemical attacks.

Stone

Stones are an important element in masonry construction and come in different shapes and sizes. They can be used in a wide variety of applications, including foundation work, road beds, railway ballast, and doorsills. They are a common feature on the facades of buildings and also make excellent decorative elements. Some stones are polished and used as a facing material for walls or roofs, while others are carved to create intricate designs.

The process of constructing a building with stones can take more time than with other materials. This is because masonry teams must wait for the appropriate weather conditions before they can continue working on the project. This can delay the completion of the building, which is especially a problem when the weather is unfavorable. To mitigate this, it’s important to set up processes for being productive on-site when the weather is favorable.

Construction with stone is an ancient practice that began when humans started constructing homes and other buildings from rocks. These structures were often built from the materials available locally. Some of the earliest examples include the round stone huts found on the Aran Islands and the elaborate pyramids of Egypt. Since then, stone has become the primary construction material for many building projects due to its strength and beauty.

Masonry is the art of constructing with stone, brick, or concrete blocks. It requires the use of hand-held and power tools to shape and dress stone. These tools range from hammers, mallets, chisels, and gouges to frame and circular saws. It is important to use the proper tools and equipment for each job to ensure that the finished product is strong and durable.

The different types of stone used in masonry are granite, limestone, and sandstone (igneous), slate and marble (sedimentary), and gneiss (metamorphic). Different kinds of stone require different techniques for construction.

For example, ashlar is a fine type of stone that requires extreme care when setting. The stones must be thoroughly cleaned, the bed surface wetted, and the mortar evenly spread over the stones and joints. The mason must carefully select the stones to be positioned in order to avoid gaps between the adjacent courses. It is also crucial to use large stones for headers and jambs and to provide through stones at intervals to increase the strength of the wall. The joints should be tampeted and pointed before the mortar sets to prevent loosening of the stones.

Concrete Blocks

Concrete blocks are a common construction material that is often used to build walls and other structures. The blocks are usually hollow on one side, and they can either be solid or have a design on them. They are also sometimes referred to as CMU (concrete masonry units). Some blocks have different finishes on their surfaces, and they can be used in various applications.

A concrete block can be made with a variety of ingredients, including cement, aggregate, and water. The blocks are then put in a large oven that is heated to a high temperature until they harden. This process takes about a day to complete. The blocks are then cooled and transported to the building site.

The blocks can be made in a number of sizes and shapes, and they can be designed to fit many different applications. They are also commonly used for landscaping projects, such as paving walkways or adding decorative elements to garden areas. They are also useful in creating non-load-bearing wall systems for fencing and other structures.

When making these blocks, cement is mixed with aggregate and water. A chemical additive, called admixture, is added to the mixture to change the properties of the final product. This is done to improve the strength, durability, and workability of the blocks. The blocks can be made in a variety of different colors by using dyes and pigments in the cement mixture.

Solid concrete blocks are also known as “cinder blocks,” although the term has become misleading in recent years. During the early years of concrete block production, producers began to add cinders to the mix in order to reduce the weight of the units and make them easier for masons to handle. While this was a common practice in the industry, codes and standards have now been established that comprehensively address the minimum physical requirements for all concrete masonry units.

In addition to being easy to handle, concrete blocks are also very durable and have a high level of fire resistance. They are also water-resistant and able to insulate against both sound and temperature. These are all important considerations when choosing the right block for your project.

Mortar

Mortar is a strong binding material used to close the gaps between bricks or other blocks that are used in construction. It is traditionally made from a combination of Portland cement, hydrated lime, and sand. This mix is what bricklayers use to “bed” masonry units such as concrete block, brick, and stone. It is important that mortar is made correctly, as it can help strengthen a structure and protect the bricks from moisture. Mortar is typically made on site, although pre-mixed mortar has become more common these days.

Generally, mortar is prepared on the spot by mixing a required quantity of water with a mixture of binding materials like cement or lime and fine aggregates like sand. However, ready-mixed mortar possesses admixtures for set-control and may be utilized in construction for periods up to 2.5 hours after primary blending.

Lime mortar is a mix of lime and sand with a small amount of clay, which can be added to give it more strength and flexibility. It is used to bind the masonry bricks together and to plaster the surfaces of a masonry structure. It is also commonly used to repoint a masonry wall.

Cement mortar is a stronger and more durable version of lime mortar. It is made by combining Portland cement with sand and fine aggregates such as limestone or siliceous sand. This mix is then mixed with water to create a paste that can be applied to a masonry surface to bond the bricks together and provide a smooth finish.

There are several types of cement mortar, and each type is intended for a specific application. The type of mortar you choose should be based on the strength and durability requirements of your project. For example, the M-type mortar has a higher compressive strength and is designed for exterior use, while the N-type mortar has low shrinkage and is ideal for interior use.

To ensure that your mortar is prepared properly, it’s important to make sure the area you’re working on is wet before applying the mortar. This will prevent the mortar from sticking to dry areas of your wall, which can lead to cracks or other structural problems. You can wet the surface by spraying it with water, being careful not to saturate it.

Radiant Barrier

Radiant Barrier

Radiant Barrier Houston keeps homes in warm climates cooler without cranking up the air conditioning. In some cases, it can even reduce cooling costs compared to thermal insulation materials.Radiant Barrier

Radiant barriers are installed in attics to limit the amount of heat that reaches the living space. But they need to be installed correctly to work properly.

Radiant barriers are foil-backed insulation that is typically installed in the attic of new-construction homes. They can also be used in the attics of existing homes if the proper construction methods are followed.

Unlike conventional insulation, radiant barriers have a low emissivity factor of about 0.1. Combined with a high R-value, this allows them to effectively reflect radiant heat away from the attic space. A radiant barrier can save a home owner money in energy costs by lowering the amount of time an air conditioner must run.

The primary reason radiant barriers work is because they prevent the movement of thermal radiation that comes from the sun through the roof. Without a radiant barrier, this radiation will warm the attic and, subsequently, the living spaces below. The heat moves from room to room through convection, but with a reflective barrier installed in the attic, this radiant heat is reflected away. This keeps the attic cooler, which in turn keeps the living spaces below cooler.

A radiant barrier can even be used on buildings with metal roofs, where the conductive properties of the metal can cause it to get quite hot. It is important to note that radiant barriers will not be as effective in all locations because some building proportions increase the movement of thermal radiation, making a radiant barrier less efficient. Generally, roofs with a steeper slope, more direct sunlight, and poor ventilation will need additional insulation along with a radiant barrier to achieve optimum efficiency.

Because of their low emissivity, radiant barriers are able to reflect up to 97% of radiant heat, meaning that they have higher R-values than most attic or wall insulation types. The insulating capabilities of radiant barriers can be substantially increased if they are installed in conjunction with conventional insulation.

In order to provide a true R-value, the radiant barrier must be installed in a ventilated attic and surrounded by insulation of an appropriate R-value and cellulose density. A properly installed radiant barrier will protect the attic and the entire house from radiant heat loss, allowing a much more comfortable temperature in all rooms and savings in both heating and cooling costs.

Why do I need a radiant barrier?

The most common reason for installing a radiant barrier is to reduce cooling costs. It does this by preventing your attic from heating up, reducing the need to cool the house. However, it also increases the efficiency of your insulation. This is because, with a radiant barrier installed, the air in your attic will stay cooler, meaning that the other insulation materials in your attic can do their job of keeping the rest of your home cool.

A radiant barrier works like a reflective sunshade for your roof, directing the sun’s heat back into the atmosphere. It does not prevent heat transfer by conduction or convection, so it is often supplemented with other insulation products that do.

Different types of radiant barriers offer varying degrees of reflectivity and emissivity, as well as durability, strength, water vapor permeability, and flammability. Some are made of plastic films, while others are made of kraft paper or plywood roof sheathing with foil laminated on top. Some are even available in spray-on form. Before buying a radiant barrier, it is important to understand its specifications, as the cost can vary greatly. Radiant barriers are often offered in packages with other energy-saving features, such as blown-in insulation, to save you time and money.

When comparing prices, it is important to consider the type of attic and its existing insulation. Some radiant barriers come pre-laminated and can be simply tucked into the attic under the roof sheathing. This is the most commonly used method of installation. It is best to avoid stapling the radiant barrier directly on top of existing insulation because it may trap moisture, causing it to degrade over time.

For homes with ductwork in the attic, a radiant barrier is especially beneficial because it can help keep the ducts cool as well. This can extend the life of your ductwork and the life of your HVAC system as a whole, as well as keep you and your family comfortable all year. It is a simple and relatively inexpensive solution to reducing your summer cooling bills.

How do I install a radiant barrier?

The primary purpose of a radiant barrier is to reflect the sun’s heat away from the home, and it can be installed in a variety of ways. It can be placed under roof sheathing, draped over joists or rafters, or laid out over existing insulation on the attic floor. The latter is the most popular method, as it keeps heat out in the summer and warm air in during the winter, providing a year-round energy-saving benefit.

If you’re installing a radiant barrier in an existing home, make sure that you do not cover any ductwork and that any junction boxes, electrical wiring, or plumbing vents are exposed. Also, be sure to carefully inspect your attic for any signs of moisture that may have accumulated over time. Moisture can impact the performance of your radiant barrier, reducing its efficiency.

You’ll also want to check your attic ventilation to make sure that it’s adequate and to ensure that you don’t have any ridge or gable vents blocked with roofing materials. This will allow the attic to vent properly and will help to ensure that your radiant barrier is working as it should.

To install a radiant barrier over existing insulation, you’ll need to clear the attic, then measure and cut the foil to size, overlapping and stapling as necessary to cover the attic space. You can use a standard staple gun for this job, but it’s a good idea to test the thickness of your staples on a scrap piece of radiant barrier before using them in order to prevent jamming and incomplete penetration. Once the radiant barrier is in place, be sure to remove any loose material and re-staple any areas that have come undone. It’s also a good idea to inspect the foil regularly for any holes, punctures, or tears that should be repaired as soon as possible. This will keep the reflective surface intact and minimize the loss of heat-reflecting properties over time. Periodic inspections and timely repairs will ensure that your radiant barrier continues to provide maximum energy-saving benefits for years to come.

Which Way Should a Radiant Barrier Face?

When a radiant barrier is installed in an attic, it should be draped over the existing insulation. Some radiant barriers come with adhesive on one side to help hold them in place. When installing the adhesive side of the radiant barrier, be sure that it is pointing toward your attic floor. If you are using a non-perforated radiant barrier, it will need to be stapled to the attic floor joists over the existing insulation in order to perform well. If you are using a perforated radiant barrier, it can be placed over the attic floor insulation or over the joists. The perforations in the barrier allow water vapor to pass through the insulation, preventing condensation.

In most homes, the attic is under-insulated. This can lead to higher cooling costs during the summer. A radiant barrier can lower your energy costs by decreasing the amount of heat that travels from your roof into your home.

A radiant barrier works by reflecting the sun’s rays back into the atmosphere. It is very similar to the way a reflective sunshade on your car prevents UV radiation from warming the interior of your vehicle. A radiant barrier can also decrease the amount of heat that transfers through your attic ceiling into your home, saving you money on your electricity bill.

When choosing a radiant barrier, it is important to consider its R-value and emissivity. A radiant barrier with a high R-value and low emissivity will offer the best performance.

Some radiant barriers are made of foam or bubbles that are enveloped by two or more surfaces of foil. These materials have a higher R-value than a pure aluminized film radiant barrier, but they aren’t as effective in reducing heating costs.

When selecting a radiant barrier, make sure it meets all fire rating requirements. USI offers several different products that meet the highest fire ratings of Class A and Class 1, tested under ASTM E84 with the optional E2599 mounting method. You should also consider the permeability of the material. USI offers both breathable and non-breathable radiant barriers. It is important to use a breathable radiant barrier, especially in cold climates, in order to avoid condensation and moisture problems. In addition, it is important to inspect your insulation at regular intervals. These inspections can assist you in identifying and repairing any moisture issues that may be present.

How to Clean Wood for Staining

deck cleaning

When it comes to cleaning wood for staining, it’s a good idea to start with a fresh, clean surface. Sweep away loose debris with a broom, then spray the deck surface with a cleaner and allow it to soak for the recommended time frame.deck cleaning

This cleaner is an EPA Safer Choice and is less toxic than bleach-based products. It also repels dirt and stains, so the deck doesn’t need as much maintenance. However, if you need some professional help, you can contact Pro Deck Builders Charleston.

The first step is to remove any debris that has accumulated on the deck surface. This can include leaves, pine needles, and dirt. A simple broom or leaf blower can help clear the surface, while a putty knife can be used to get in between the boards and any nooks and crannies where debris can collect.

A garden hose with a spray nozzle will be useful to evenly disperse the cleaning solution on the surface. The spray also helps to loosen any dirt and grime that has collected on the wood.

Next, a deck cleaner that is formulated for the type of decking, whether wood or composite, should be applied. Some are available in pre-mixed formulas, while others must be diluted with water. If you are using a dilution, make sure to follow the manufacturer’s instructions to avoid damaging the surface.

Some deck cleaners contain mildewcide, which prevents the growth of future mold and mildew. If you are treating a specific problem area, a stronger scrub brush may be needed to remove the mildew stains.

Vinegar, whether diluted or not, is a common household cleaning agent that works well on many surfaces. However, if it is allowed to soak into the deck or is left on too long, it will cause the wood to leach, which can damage and weaken the structure.

If you want to use a natural cleaning product, try a mix of baking soda and vinegar or distilled white vinegar. Vinegar is a strong deodorizer and can even be effective in removing ants. Baking soda, on the other hand, is a gentler alternative that can be used to clean many different surfaces and is especially good for scrubbing greasy or sticky areas.

Pre-Rinse

A deck needs more than a broom and a dustpan to look its best. Summer hot dogs, fall leaves, harsh winter weather, and general wear and tear take a toll on natural wood or composite decking. It’s time for a deep clean before you put your deck back to use.

Before you apply a cleaning solution, spritz the deck with water to soften the dried cellulose fibers that hold dirt and mildew. This pre-rinse will also allow the cleaner to be dispersed more easily. A superfine sprayer attachment on a garden hose works well.

Start by applying a wood brightener that’s formulated for your deck’s type of wood. Many of these products include a detergent, bleach, and a chemical that reacts with the specific woods to remove stains and brighten the deck’s appearance. Read the product’s label and follow the manufacturer’s directions for application.

A few squirts of a deck cleaner will help with dirt and mildew removal, but you may need a stronger product to get rid of particularly stubborn problems. Bleach—especially chlorine bleach—will whiten the deck unnaturally, corrode metal elements, and harm plant life. Look for a non-chlorine bleach that contains oxygen, which will kill mold and algae and remove stains.

After you’ve scrubbed and rinsed, let the deck dry thoroughly. Ideally, you want to wait 48 hours before you walk on it and until it’s dry enough to feel without a splinter between your feet.

While you wait, check for loose screws or nails in the ledger board, rails, and joists. Tighten or replace as necessary. Also look for areas where the deck boards are separating at the seams. If you have a lot of these areas, it’s likely the deck is sagging and will need to be sanded or replaced.

Scrub

Before you apply any cleaner, rinse your deck with a garden hose to get rid of any dirt and debris stuck to it. This helps the cleaner disperse and work more effectively. It also protects plants that are close by from the harsh chemicals in some cleaning products.

Chlorine bleach-containing cleaners are not recommended for cleaning treated wood, such as that used on a deck, because they can damage it and leave it with an unnatural whitewashed look. They may also raise the grain of the wood, causing it to become rougher and more likely to attract mildew. Chlorine bleach-containing cleaners can also corrode metal fasteners and screws, which may cause them to loosen or even rust. Additionally, it can discolor wood and break down in sunlight, which can cause the surface to fade over time.

A safer alternative to chlorine bleach is oxygen bleach. This product is available as a liquid or as a powder, and it works well to remove oil and grease stains as well as mildew stains. This cleaner is gentle enough to use on stained decks and will not harm nearby landscaping or pets if you are careful. For tough stains, you can add powdered borax to the oxygen bleach solution and scrub thoroughly before rinsing.

Always follow the instructions on the label of the cleaner you choose. Work in sections, and make sure to allow the cleaning solution to set for the amount of time suggested by the manufacturer. Once the time is up, use a hard-bristled broom with synthetic bristles to scrub the area. If needed, sand the area with a sander to help smooth it out.

Apply the cleaner.

The best cleaners remove a wide range of grime, from dirt and mildew to fungus. Some are biodegradable, which helps protect the environment from toxins seeping into lawns and other plant areas. Others are formulated to leave behind a protective coating that discourages future mildew and mold growth.

A sprayer or mop works best for applying the cleaner. For tough spots, you can also use a scrub brush. Regardless of the method, wear rubber gloves to protect your skin and eyes from splashes. Some cleaners contain bleach or oxidizing agents that can cause irritation, so always follow the manufacturer’s instructions for wearing eye protection and gloves.

If your deck has dark stains that don’t fade even after cleaning, consider buying a product designed to lighten wood and brighten fading stains. Also known as restorative cleaners, these products typically feature oxygenated ingredients such as sodium percarbonate that work like bleach but are safer for wood than oxalic acid. Some of these cleaners are also designed to be used before staining to help the new coat of stain take on a more uniform color, which is important for making sure that your deck looks good and lasts long after it’s stained.

Another option is a pre-mixed solution, such as the one from Simple Green Oxy Solve Total. This ready-to-use cleaner doesn’t need to be mixed or diluted, which makes it more convenient than some other options. This cleaner is certified as a U.S. EPA Safer Choice cleaner, which means that it’s safe to use around people, plants, pets, wildlife, and waterways, unlike some other options. It’s also very effective at removing a variety of contaminants, including black algae, mold, and mildew.

Let it dry.

As soon as the deck is clean, it must be allowed to dry thoroughly. This will ensure that the new stain is properly absorbed and won’t be flaked off by moisture, as can happen if you apply a water-based stain to a damp deck. A light sweeping (daily, ideally) will quickly remove twigs, dirt, and other natural debris from the surface, but if your deck is especially large or heavily stained, you may want to consider investing in a cordless blower that makes quick work of twigs and other debris and allows you to reach high areas without a ladder. A few brands of these are available that do a good job and are safe for use on wood surfaces.

After the deck is fully dry, you can replace any softly rotting boards and stain the deck. Staining isn’t a simple process, but it isn’t difficult either. Before you begin, make sure that the weather is good and that you have the time to dedicate to the project. It is best to avoid staining on a windy day. One gust could send splatters of your stain all over windows, siding, and nearby plants. Cover any shrubbery with tarps or plastic drop cloths to prevent damage from overspray.

There are many different wood cleaners available to purchase or make at home, but a few are essential to the staining process. A TSP substitute will quickly remove most stains and is safe for use on all types of wood. Oxalic acid wood cleaner can also remove tannin stains and iron stains, which are common on redwood and cedar decks. However, it is not as effective against mildew or other organic stains. Be sure to read and follow all product directions carefully, and always wear rubber gloves when mixing or applying the cleaners, as many contain ingredients that can irritate skin.

What Does a Handyman Do?

Handyman

A handyman is a “jack of all trades” who can handle various general repair and maintenance tasks. They differ from a contractor, who generally has earned some license for specialized expertise. From assembling IKEA furniture to drilling into walls, a handyman needs many tools. One of the most essential is a hand sander.

HandymanHandyman Naperville IL specializes in repair or maintenance tasks like repairing leaky faucets and installing doorknobs. But some offer a more comprehensive range of services, including painting, plumbing, and electrical work. These professionals are sometimes called “jacks of all trades” and often have a well-rounded knowledge base to complete various home improvement projects.

Some handymen work independently, while others may work as a freelance contractor for repair service companies or even property management firms. They are generally paid per project, which typically includes assessing the job at hand, making recommendations for approaches, estimating the cost of labor and materials, securing said materials and then performing the work. They may also be responsible for cleaning up any messes they create.

Handymen can install a wide range of devices and appliances for clients, including smart home applications. These can include video doorbells, virtual assistants, and thermostats. They can also handle more complicated electrical work, such as changing light bulbs or rewiring an outlet. However, complex electrical work should be completed by licensed electricians.

A handyman can also help a homeowner with smaller carpentry jobs, such as replacing or repairing window and door trims. They can also sand and refinish wooden decks, pergolas or other timber structures. They can also mount flat-screen TVs on walls or hang holiday lights.

It’s not uncommon for homeowners to have a long list of maintenance tasks that need to be addressed. But sometimes it can be hard to find the time, skills, or equipment needed to get everything done. This is where a professional NYC Handyman comes in. They can take care of all those repairs and improvements that you’ve been putting off for far too long.

The majority of handymen are jacks of all trades and have the ability to fix a wide range of issues in both residential and commercial spaces. They can handle everything from fixing broken fixtures to assembling furniture. They can even paint small areas of a house, though they should never attempt to work on any larger painting projects that require a licensed painter.

Painting

Of all the services handymen offer, painting (both interior and exterior) is probably the most popular. It’s a great way to refresh the look of a room, and a fresh coat of paint can also help make a home or business more appealing to buyers if it’s on the market. Handymen can also repaint trim work around windows and doors, or re-stain or repaint decks or fences.

Inside the home, handymen can offer furniture assembly services, hanging mirrors or pictures, and installing closet organizers. They can also mount TVs and hang curtains or blinds. This is a service that’s particularly useful for people who’ve recently moved or had new furniture delivered and want their spaces to feel put together and complete.

Handymen can also paint walls if they’ve been scraped or damaged by furniture or kids playing. This is one of the most common handyman services requested, and New York Handyman Pro’s painting contractors have years of experience laying tile and recoloring walls and rooms. They know how to prep the surface, apply a coat of paint with precision, and make sure the finished product looks clean and professional.

Whether or not to offer these or other services depends on the size and scope of the job and whether it requires any special skills or equipment that a licensed tradesperson would need. For example, a kitchen remodel isn’t something a handyman can do, but a qualified plumber or electrician could. Knowing which services you can and can’t provide will help you market your business to the right customers. You can create a handyman services list in Jobber and import it into your client documents when creating quotes, making it easy to reference and clearly communicate to your clients which tasks you’re capable of.

Plumbing

Many small plumbing jobs can be done by handymen, such as fixing a dripping faucet or replacing a toilet seat. However, larger projects that require a more in-depth knowledge of plumbing are better suited for licensed plumbers. These types of projects may involve installing a new shower or tub, sinks, or toilets, or repairing or replacing damaged drywall or vanities due to the presence of water or plumbing leaks.

Plumbers often charge more for their services than handymen, but they have a much greater understanding of the intricacies of plumbing. They can also offer more comprehensive services, such as rerouting pipes or replacing entire fixtures. Plumbers are also required to carry liability coverage, which protects them and their customers from financial repercussions in the event of an accident or damage caused during work performed on a property.

While a state-specific license is not needed for a handyman, most states do have requirements such as minimum labor and materials amounts. Some states also require that a handyman be insured and bonded, which helps protect the client in the event of an injury or damage to property during a project. Additionally, a handyman may need to obtain a permit for certain projects in order to comply with local building and zoning regulations.

Most states allow handymen to perform a limited amount of specialized work, such as electrical and HVAC repair. However, these types of jobs are generally outside the scope of what a typical handyman is trained to do, and they should be turned down if a request is made for them.

While there is no education requirement for a handyman, training in areas such as construction, electrician, welding, small appliance repair and HVAC can be beneficial. Additionally, experience with tools and a good working knowledge of basic plumbing repairs are necessary. Many handymen are self employed, but they can also find work through home warranty companies or repair service firms. For some, this is a side or part time job, while for others, it is a full-time career. Some even choose to become certified handymen, which increases their earning potential and can help them stand out from the competition.

Electrical

Electrical handymen are skilled at a variety of tasks that involve electricity. They can install light fixtures, run wires through walls to connect appliances, and repair damaged outlets or switches. They can also replace old switches and sockets with new, energy-efficient ones.

Some electrical jobs are too complicated for a handyman, and they should only be handled by licensed electricians. This is because complex electrical work can cause serious damage to a home, and it requires special knowledge of wiring, circuits, and switches. If a handyman completes such work without the proper training, they could be putting the homeowner at risk of injury or fire.

Handymen can help with the installation of a number of different types of light bulbs. They can also install smoke detectors and other safety devices. Additionally, they can run wires from the main power source to outlets and other locations in a house. This is especially important when doing renovations that require the relocation of appliances.

When a light fixture isn’t working, a handyman can fix the problem by replacing the bulb or rewiring it. They can also install new outlets and switches, as well as test fuses and circuit breakers to ensure they are functioning properly.

A common electrical problem is a faulty or overloaded outlet. Handymen can check if there is enough power to an outlet by testing it with a multimeter. They can also upgrade old outlets to GFCI outlets, which are safer and more efficient than traditional ones.

In addition to electrical repairs, handymen can also fix problems with power tools. They can repair or replace broken blades on cords and replace stripped screws. They can also sand and stain wooden decks, pergolas, and other timber structures.

If you have a small home project that needs to be completed quickly and professionally, a Handyman may be your best choice. They are qualified to take on a wide range of home improvement tasks, including painting, carpentry, and plumbing. They can also handle minor electrical work, such as installing a ceiling fan or light fixture.